IFAN factory 30+ years manufacture experience support color /size customization support free sample.Welcome to consult for catalog and free samples.This is our Facebook Website:www.facebook.com,Click to watch IFAN’s product video.Compared with Tomex products, our IFAN products from quality to price are your best choice, welcome to buy!
When it comes to modern construction, PPR pipes (Polypropylene Random Copolymer pipes) have gained widespread popularity for their durability, ease of installation, and cost-effectiveness. These pipes are commonly used for water supply systems, heating installations, and other plumbing applications. Proper installation of PPR pipes is essential to ensure optimal performance and longevity. In this step-by-step guide, we’ll walk you through the installation process for PPR pipes, providing you with all the information you need to get the job done right.
Why Choose PPR Pipes?
Before diving into the installation process, it’s essential to understand why PPR pipes are preferred in many construction projects. These pipes offer several benefits, including:
– Durability: PPR pipes are resistant to corrosion, scaling, and are highly durable, lasting for up to 50 years.
– Environmentally Friendly: Made from recyclable polypropylene, PPR pipes are a sustainable choice.
– Non-Toxic: Free from harmful chemicals like lead or cadmium, PPR pipes are ideal for drinking water systems.
– Easy to Install: The pipes are lightweight, easy to handle, and can be connected using fusion welding, a straightforward method.
Now that you know why PPR pipes are the go-to option for many builders, let’s break down the installation process.
Step-by-Step Guide to Installing PPR Pipes
Step 1: Gather the Necessary Tools and Materials
Before starting the installation, ensure you have all the required tools and materials:
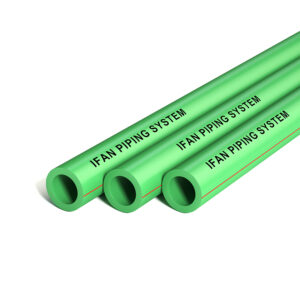
– PPR pipes of the appropriate size and length
– Pipe cutters or saw
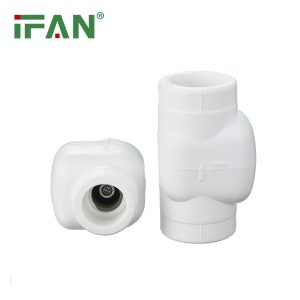
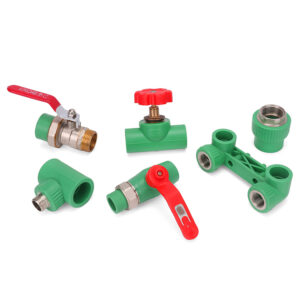
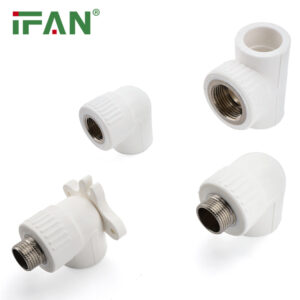
– PPR pipe fittings (elbows, tees, couplings, etc.)
– Fusion welding machine (for heat fusion)
– Pipe wrenches
– Measuring tape
– Marker
– Cleaning supplies (like alcohol wipes)
– Safety gloves and goggles
Step 2: Measure and Cut the PPR Pipes
The first step in the installation process is measuring the required length of PPR pipes. Use a measuring tape to measure the space where the pipes will be installed. Ensure that your measurements are accurate, as this will minimize the need for adjustments later.
Once you have the correct length, use a pipe cutter or a saw designed for plastic pipes to cut the PPR pipes. Make sure the cuts are straight to ensure a secure connection later.
Step 3: Clean the Pipe and Fittings
Before assembling the pipes, it’s important to clean both the PPR pipes and the fittings to ensure proper bonding. Use an alcohol wipe or a clean cloth to remove any dust, dirt, or debris from the ends of the pipes and the inside of the fittings.
Proper cleaning helps ensure a smooth fusion welding process, which is crucial for creating strong, leak-free joints.
Step 4: Heat the Pipes and Fittings for Fusion Welding
Fusion welding is the most common method used for connecting PPR pipes. The process involves using heat to melt the ends of the pipes and fittings, then joining them together. To begin, set your fusion welding machine to the correct temperature, usually around 250°C (482°F).
Place the pipe and fitting on the welding machine’s heating plates, ensuring that the pipe and fitting are perfectly aligned. Keep both parts in place for the recommended time, typically around 10 to 15 seconds, depending on the pipe size and machine specifications.
Step 5: Join the Pipe and Fitting
Once the pipe and fitting are heated, remove them from the fusion welding machine and immediately join them together. Quickly align the pipe and fitting, pressing them firmly to ensure a secure connection. Hold them together for a few seconds to allow the molten material to cool and bond.
Be careful not to twist the pipe or fitting during this process, as this could cause a weak joint. Allow the joint to cool for several minutes before moving on to the next section.
Step 6: Install the PPR Pipes
With the pipes and fittings welded together, begin installing the connected sections of **PPR pipes**. For horizontal runs, use pipe supports or hangers at regular intervals to keep the pipes stable. For vertical installations, ensure that the pipes are properly secured to prevent sagging or misalignment.
Make sure that the pipes are not subjected to any stress or strain during installation, as this can cause the joints to weaken over time. Ensure all pipes are level and properly aligned with the intended flow direction.
Step 7: Test for Leaks
Once the installation is complete, it’s essential to test the system for leaks. Turn on the water supply and check each connection point for any signs of leaks or water seepage. If any issues are detected, shut off the water supply and recheck the fusion welds or fittings for proper alignment. You may need to redo any problematic joints.
Step 8: Insulate and Protect the Pipes (Optional)
For added durability and energy efficiency, consider insulating your **PPR pipes**. Insulation helps maintain water temperature, reduces energy costs, and protects the pipes from external environmental factors such as extreme temperatures.
In areas where freezing is a concern, pipe insulation will prevent the pipes from freezing in cold weather. It also helps in reducing condensation on hot water pipes.
Step 9: Maintain the System
After installation, PPR pipes require very little maintenance due to their corrosion-resistant properties. However, periodic inspections to check for leaks or signs of wear are always a good practice. Additionally, avoid using abrasive cleaning materials that could damage the surface of the pipes.
Common Mistakes to Avoid During PPR Pipe Installation
While the installation process for PPR pipes is straightforward, here are some common mistakes to avoid:
1. Incorrect Pipe Cutting: Ensure that cuts are straight and accurate to avoid weak joints.
2. Not Properly Heating the Pipes: If the pipes and fittings are not heated to the correct temperature, the fusion weld will not bond properly, leading to leaks.
3. Skipping the Cleaning Step: Failing to clean the pipes and fittings can result in poor fusion welding and weak connections.
4. Not Testing for Leaks: Always test the system for leaks before finalizing the installation.
5. Improper Pipe Support: Make sure pipes are securely supported to prevent sagging or movement that could affect the joints.
Conclusion
Installing PPR pipes is a simple and efficient process when done correctly. By following the step-by-step guide outlined above, you can ensure that your PPR pipe installation is strong, leak-free, and long-lasting. Remember to use the right tools, follow the correct procedures for fusion welding, and always test the system for leaks after installation. With proper installation, PPR pipes will provide a reliable, environmentally friendly, and cost-effective solution for your plumbing needs for many years to come.
Frequently Asked Questions (FAQ)
1. What is the best way to join PPR pipes?
– The best way to join PPR pipes is through fusion welding, which uses heat to melt the ends of the pipe and fitting, then bonds them together.
2. Can PPR pipes be used for both hot and cold water systems?
– Yes, PPR pipes are ideal for both hot and cold water systems due to their ability to withstand high temperatures and their excellent durability.
3. How long do PPR pipes last?
– PPR pipes can last up to 50 years with minimal maintenance, making them a long-lasting solution for plumbing needs.
4. Do PPR pipes require any special tools for installation?
– Yes, PPR pipes require a fusion welding machine and pipe cutters to properly join and cut the pipes during installation.
5. Can PPR pipes be recycled?
– Yes, PPR pipes are made from polypropylene, which is 100% recyclable, making them an eco-friendly option for construction and plumbing.