
IFAN factory 30+ years manufacture experience support color /size customization support free sample.Welcome to consult for catalog and free samples.This is our Facebook Website:www.facebook.com,Click to watch IFAN’s product video.Compared with Tomex products, our IFAN products from quality to price are your best choice, welcome to buy!
Polypropylene Random Copolymer (PPR) fittings are an increasingly popular choice for modern plumbing systems due to their durability, cost-effectiveness, and ease of installation. This guide will walk you through the step-by-step installation process for PPR fittings, ensuring you achieve a secure, leak-proof plumbing system. Whether you’re a professional plumber or a DIY enthusiast, this article will help you understand the installation procedure and provide you with valuable tips for a successful setup.
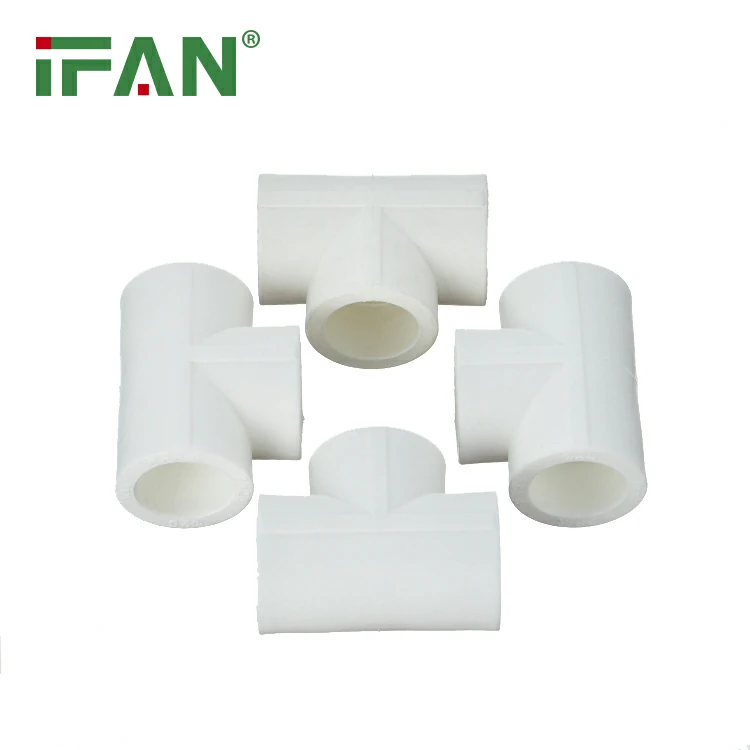
What Are PPR Fittings?
PPR fittings are components made from a high-quality plastic polymer (polypropylene random copolymer). These fittings are used to connect PPR pipes in various plumbing applications, including hot and cold water systems, industrial plumbing, and even underfloor heating systems. PPR fittings are known for their impressive resistance to corrosion, high temperature, and chemical exposure.
Tools Required for Installing PPR Fittings
Before you begin the installation process, make sure you have the necessary tools:
- PPR Pipes and Fittings: Ensure you have the correct size and type of fittings (elbows, couplings, tees, etc.) to match your plumbing design.
- Fusion Welding Machine: This is a specialized tool used to heat and fuse the PPR pipes and fittings together.
- Pipe Cutter: To make clean, straight cuts in the PPR pipes.
- Pipe Cleaning Tools: To remove dust, debris, and moisture from the pipe ends.
- Measuring Tape and Marker: For accurate measurements and marking pipe cut lines.
- Deburring Tool: To smooth the edges of cut pipes to ensure a proper fit.
Step-by-Step Installation Process for PPR Fittings
Step 1: Planning and Measuring the Plumbing Layout
The first step in the installation of PPR fittings is to plan the entire plumbing layout. This involves understanding where each pipe will go and which fittings will be required. Measure the distances carefully, ensuring you account for changes in direction, pipe lengths, and connection points. Mark these measurements on the pipes using a marker.
Tip: Use a measuring tape and double-check your measurements to avoid errors that could lead to extra cuts or waste.
Step 2: Cutting the PPR Pipes to the Correct Length
Once you’ve marked the required lengths, use a pipe cutter to cut the PPR pipes to size. Ensure that the cuts are straight and clean. Any irregularities in the cuts can affect the joint’s integrity and cause leaks.
Tip: Use a pipe cutter designed specifically for PPR pipes to ensure a smooth and precise cut.
Step 3: Preparing the Pipes and Fittings
After cutting the pipes, it is essential to clean the ends of the pipes and the inside of the fittings. Use a cloth or cleaning tool to wipe away any dust, dirt, or moisture. This is important because dirt or water can cause improper fusion, leading to weak or leaking joints.
Tip: Make sure the pipe and fitting are completely dry and free from debris before proceeding to the next step.
Step 4: Heating the PPR Fittings and Pipes
To connect PPR pipes and fittings, you’ll need to use a fusion welding machine. Set the temperature of the machine according to the manufacturer’s instructions (usually around 260-280°C). Insert the end of the PPR pipe and fitting into the fusion tool, ensuring that both are seated properly.
Tip: Keep the heating time consistent for both the pipe and the fitting to ensure a strong bond. Usually, 5-7 seconds of heating time is sufficient.
Step 5: Fusing the Pipe and Fitting Together
Once both the pipe and fitting are heated, remove them from the fusion machine and quickly insert the heated pipe into the fitting. Make sure the pipe is pushed all the way into the fitting to form a tight, secure connection. Hold them in place for a few seconds to allow the plastic to cool and solidify.
Tip: Avoid rotating or moving the pipe while the fusion joint is cooling to ensure the integrity of the joint.
Step 6: Checking the Joint for Leaks
After the joint has cooled and solidified, it is important to check for leaks. This can be done by running water through the system and inspecting each joint for any signs of leakage. If any leaks are detected, reheat the joint and repeat the fusion process.
Tip: It is a good idea to test the system with water pressure to ensure all joints are securely sealed.
Step 7: Installing Additional Fittings and Completing the System
Repeat the heating and fusion process for any additional fittings, such as elbows, tees, and couplings. Once all the fittings are in place, ensure the entire system is properly aligned and secured. You can use pipe brackets or supports to hold the pipes in place.
Tip: Keep the pipe and fitting alignment straight to avoid additional stress or strain on the joints.
Step 8: Final Inspection
After the entire plumbing system is installed, conduct a thorough inspection to ensure all connections are secure and leak-free. Inspect the joints for any signs of improper fusion or alignment issues.
Tip: If you detect any issues, address them before completing the project to avoid potential leaks or system failure.
Benefits of Using PPR Fittings in Plumbing
- Durability: PPR fittings are highly resistant to corrosion and wear, which makes them a long-lasting choice for plumbing systems.
- Cost-Effective: PPR pipes and fittings are less expensive compared to metal alternatives, making them ideal for budget-conscious projects.
- Easy Installation: The fusion welding method allows for a fast and reliable installation process without the need for specialized skills.
- Energy Efficiency: PPR fittings have excellent thermal insulation properties, helping to maintain water temperature and reduce energy consumption.
Frequently Asked Questions (FAQs)
1. How long do PPR fittings last?
PPR fittings can last for over 50 years with proper installation and maintenance. Their resistance to corrosion and wear ensures they provide a long lifespan in both residential and commercial plumbing systems.
2. Can PPR fittings be used for hot water systems?
Yes, PPR fittings are ideal for hot water systems. They are designed to withstand temperatures up to 95°C (203°F), making them perfect for use in both hot and cold water applications.
3. Is the installation of PPR fittings difficult?
No, the installation process for PPR fittings is straightforward. It requires basic plumbing skills, the right tools, and following the correct fusion welding technique. Even DIY enthusiasts can successfully install PPR fittings with proper preparation.
4. Do I need a professional to install PPR fittings?
While PPR fittings can be installed by a DIY enthusiast with the right tools and instructions, professional plumbers are recommended for larger or more complex installations to ensure optimal performance and safety.
5. Are PPR fittings resistant to chemicals?
Yes, PPR fittings are highly resistant to a wide range of chemicals, making them suitable for industrial applications where aggressive substances are transported. They are also resistant to corrosion, unlike metal fittings.
By following these step-by-step instructions and tips, you can confidently install PPR fittings and create a reliable and durable plumbing system. Whether you’re a homeowner or a professional, understanding the installation process is crucial for ensuring the longevity and efficiency of your plumbing system.
